Just for fun · life

I found a small bear in the woods, so I took him home.

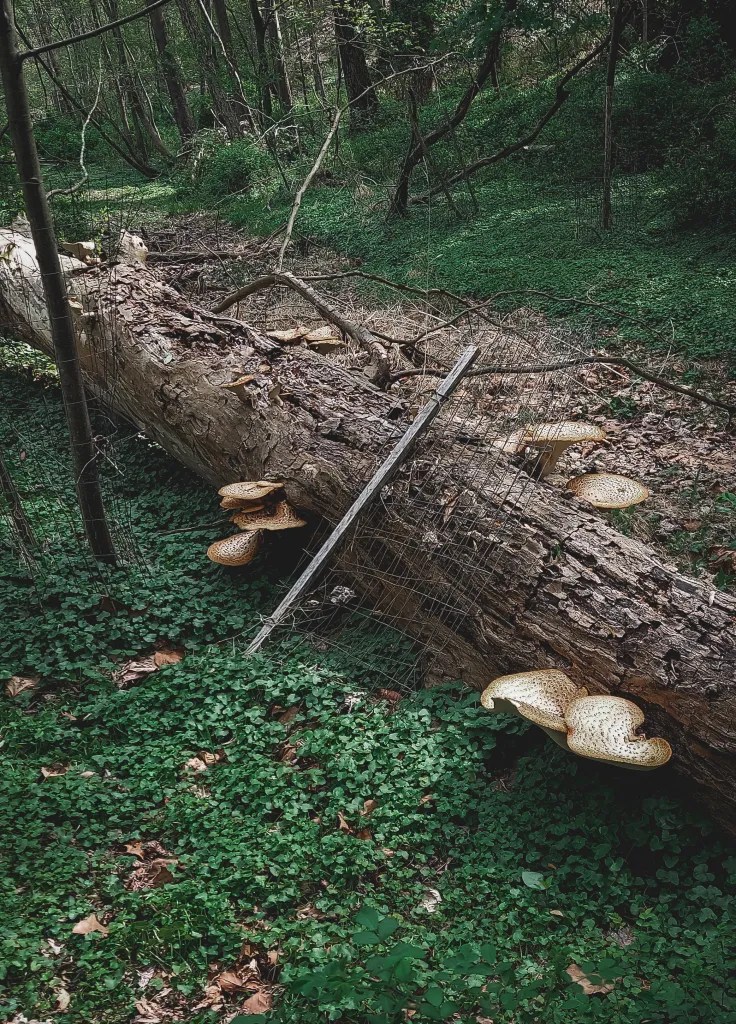
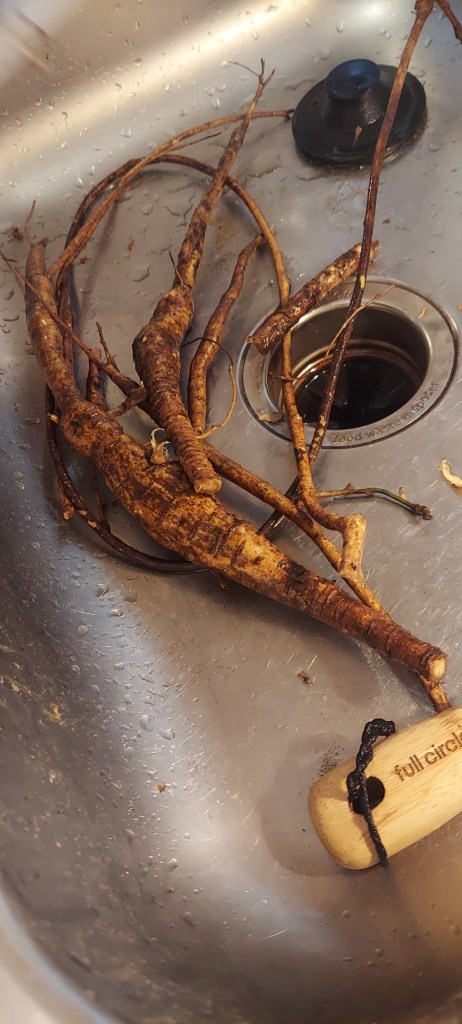
So while my friend, my Handsome Assistant, and I were digging up kudzu roots, I encountered a small guy. He was very dirty and neglected — it looked like he’d been left in the mud for the entire winter. There were seeds sprouting in his fur. Burrs. Earthworms. He had a missing ear and most of the flocking rubbed off his nose.

He was, in short, the most tragic stuffed bear that I’d ever seen.

I’ll be perfectly candid with you: I have a terrible weakness for sad things happening to stuffed animals. Those commercials with the teddy bear left in the rain? Forget about it.

When I was very little — four or five or so — I got it into my head that tornadoes were a Major Problem that I needed to be ready for. I didn’t live in an area that really experienced them, but that didn’t matter. If one came along I was going to be prepared.

I was also deeply worried about what’d happen to my stuffed animals. My parents told me that, if we ever did have to evacuate, I’d have to leave them behind. They could be replaced, and there wouldn’t be time to take them with us.

However, what I heard was that I had to be extremely efficient.

From then on, for years, every time I heard about a tornado touching down absolutely anywhere in the US, I’d take all of my stuffed animals, carefully pack them into trash bags, and line the bags up next to my bedroom door. That way, I reasoned, I could grab them without having to stop. It wouldn’t waste time, and I could still make sure that everyone got out okay. That nobody would be left behind.

(And yet, somehow, my parents were shocked when I was diagnosed with anxiety as a teenager. Shocked.)

The author, wearing gloves, holds a small brown and black teddy bear. The bear is covered in mud, worms, seeds, and various other detritus.

So I stood there, holding this dripping, squashed, crusty, almost unrecognizable teddy bear in a gloved hand.

It was very gross, and I’d have to bring him (and whatever he carried with/inside of him) into my house. Still, the thought of leaving him behind tugged at my heartstrings. Also, from a more practical standpoint, leaving him there meant that he’d eventually introduce a lot of microplastics into the environment. Birds might pick at him and take his stuffing to line their nests, where the polyester strands could tangle their chicks’ claws and injure them. I couldn’t leave him behind, could I? If not for him, then for the sake of all those hypothetical baby birds.

“I can rebuild him. I have the technology,” I declared, as I stuffed him in a tote bag.

Fortunately, I wasn’t wrong.

The first step was letting him dry out, so I could brush off as much of the crusted-over mud as possible and pick off the more egregious bits of flora and fauna that had hitched a ride.

Then, I had to unstitch around one of his paw pads so I could access his stuffing. I didn’t trust it, and I wasn’t sure what might’ve laid eggs/burrowed into it, so I needed to pull it all out. If I could clean it and reuse it, great. If not, I was going to have to safely discard it somehow.

Once he was entirely unstuffed, I could give him a thorough wash, dry, and brushing to make his fur fluffy again. It took several rounds of rinsing and a fair bit of scrubbing.

After drying, he was able to be restuffed. I had a bunch of very soft rags that I’d cut from a clean shirt. (Everlane, whose organic cotton poet shirt tore like tissue paper. Feh.) I shredded them up as finely as I could, then used my fingers, a pair of tweezers, and a chopstick to make sure that the ersatz stuffing made it to every corner of the bear.

Once he was plump and evenly stuffed again, I re-stitched his paw pad back in place with some black cotton thread. Et voilà! He was more-or-less back to what I assume was his old self again.

Except for one thing…

His right ear. It had been missing entirely from the beginning. I didn’t see it on the ground when I picked him up. From the smoothness of that side of his head, it looked like it had torn cleanly off.

The trouble is, I didn’t have any material that could make a convincing replacement. I didn’t even have any funky material that could work in a “medical prosthetics but make it fashion” way. I didn’t want to leave him with nothing, though.

I rustled up a pattern for a small, crocheted flower and a leaf. Some Malabrigo superwash merino yarn and a Czech glass bead later, and I had a rather fetching flower fascinator that’d do.

I dabbed on a coat of black paint over the rubbed-off part of his nose, and he’s good to go. He’s clean, bug-free, and even has his missing ear (somewhat) fixed. While my poet shirt didn’t do very well as an actual shirt, it did make for some excellent stuffing — firm and voluminous, but soft enough not to be lumpy.

I wish I could say that this is the first time I’ve found a small guy left in the woods and randomly decided to bring it home for restoration, but of course it isn’t. I’m at the point where this has happened often enough that I now deliberately watch for dropped toys and other objects left behind.

What can I say? I’m an absolute sucker for a sad little dummy.

Blog · life · Uncategorized

A riverside hike (with *giant* mushrooms!)

This past weekend, my Handsome Assistant and I packed a small picnic and went for a bit of a walk. This particular area is beside the northwest branch of the Anacostia River, near an abandoned mica mine. There are some really cool mineral specimens here — the usual bull quartz, but also tons of mica-bearing rocks and golden beryl.

That’s not all it has, though.

The trail is mostly shaded by trees, so it stays fairly cool even when the weather’s warm. Lesser celandine (lush, but invasive) covers the ground between the trees, creating a dense carpet that reflects the sunlight and further cools the ground. It’s poisonous to eat, though the tubers are said to be edible, and has a long history of use as a topical medicine for hemorrhoids and scrofula.

A brown haired, caucasian man in a dark blue and white tanktop reclines on a bed of lesser celandine. His eyes are closed and his expression is peaceful.
“That’s a really bad idea, you know.”
“I know, but it looks so soft.”
“There’s probably poison ivy in it.”
“Worth it.”
“You’re going to get eaten by snakes. Or ticks. Probably both.”
“It’s so soft, though!”
A close up of a small pink springbeauty flower.
Springbeauty (Claytonia virginica)

Fortunately, there was more to see than just lesser celandine. There were tiny pink blossoms of springbeauty, dense pillows of moss, fern fiddleheads, and some of the lushest skunk cabbage I’ve ever seen. We also spotted some mayapples, a few of which were even mature enough to flower. I don’t know if I’m brave enough to go back and see if there’s any fruit later this summer, but it was lovely to see regardless! (I snapped a few pics of the ones we saw, which you can find in my post on mayapple folklore and magical properties.)

Large skunk cabbage plants growing up out of a dense mat of lesser celandine.
Seriously, just look at that skunk cabbage (Symplocarpus foetidus).

We passed next to the water, eyes peeled for sparkly mica-bearing stones, when I heard a soft “bloop.” I turned my head just in time to see a startled common watersnake (Nerodia sipedon) slipping away across to the opposite bank, gracefully undulating and occasionally poking its head up like a snorkel to take a breath. I apologized for spooking it as I fumbled for my phone but wasn’t able to snap a picture before it had swum away and camouflaged itself in the mud and fallen leaves.

They’re one of the species of snakes that are often vilified for no reason. They’re perfectly harmless but can bear a passing resemblance to a venomous copperhead (Agkistrodon contortrix). Admittedly, I made the same mistake myself at first glance — not that I would’ve behaved any differently, as both the snake and I seemed pretty chill about the whole situation. Like black racers and ratsnakes, they’re guys you actually want to have around if you don’t want to have to deal with pest animals. Also, they’re one of the few reptile species that gives birth to live young, and that’s really neat!

(Also, copperheads are pretty chill, too. They might be venomous, but they’re not aggressive. Their first defensive instinct is to freeze up and rely on their natural camouflage. Bites typically occur when that either fails, or people don’t see them, step too close, and the snake gets desperate.)

A pair of young fern fronds, still curled into a "fiddlehead" shape.
Young ferns.

A little further up the trail, we were navigating over a large fallen tree. Another tree lay across it, forming a kind of steep natural bridge. As I investigated it to see if it’d be safe to cross, I heard a silky rasping sound. There, nestled in the root ball of the fallen tree, I saw the shiny black coil and pointed tail of a black racer (Coluber constrictor priapus) vanishing deeper into the tangled roots.

My favorite part, however, was running into a colony of dryad’s saddle (Cerioporus squamosus) growing from a dead tree. These are edible, fairly easy to identify, and don’t really have poisonous lookalikes. They also smell exactly like watermelon rinds, which is honestly very weird. Kind of a green, watery, fruity smell, of decidedly not the type you’d expect from a scaly tan mushroom growing out of a dead tree. I wasn’t 100% positive that that’s what I was looking at, at first. Fortunately, a combination of a quick-and-dirty ID app and friends with much more foraging experience were able to reassure me.

Also?

Dryad’s saddles get enormous.

Like, far larger than I felt was reasonable for a mushroom. Much bigger than the reishi and armillaria that grow in my front yard, at any rate.

This area has another cool feature, labeled on the map as “prehistoric rock shelter.” I haven’t found any other information about it, but it’s a nice, cool, shaded spot to sit and rest for a bit. The area underneath is at a bit of a slope, but it’s still a comfortable place to take a break.

I also found a tree that was shaped kind of like a sad skull, and a very neat feather — most likely from a hawk.

All told, it was an eventful walk and a lovely picnic. Everything was vibrant and green, and we saw (and heard!) a lot of cool wildlife.

Here’s hoping you’re also finding cool things wherever your adventures take you.

Plants and Herbs

Mayapple Folklore and Magical Properties

I love mayapples. They look like a prank. Like someone picked a bunch of leaves off of something bigger and stuck them in the ground so they could trick people into thinking that that’s how a mayapple grows. They’re patently ridiculous and fantastic.

I remember the first time I encountered them. Though I don’t remember when, or where, I do remember seeing a bunch of sprouts that looked like folded beach umbrellas for fairies. I wasn’t sure if they were plants or mushrooms at first — before the leaves fully open, they almost look more like fungi than anything planty.

The other day, my handsome assistant and I were on a walk and ran into a whole patch of them. Even better, some of them had flowers, which also look like some kind of prank. The only thing better is when they fruit, which I, personally, find hilarious. Just one leaf with a big old fruit hanging off of it. It looks like a video game monster. Like you’re supposed to get close, then find out the fruit is actually full of teeth and now you’re out of extra lives.

Anyway. Mayapples are interesting for more than their bizarre looks. They can also be a very useful plant.

Mayapple (Podophyllum peltatum) is sometimes called “American mandrake,” and the name is apt. Like mandrake (Mandragora species), it’s poisonous. It also has a pretty large root that often branches similarly to that of a mandrake.

The name Podophyllum peltatum comes from the Greek words podo, meaning “foot,” and phyllum, meaning “leaf,” as well as peltatum, meaning “shield.” It’s a pretty apt name when you look at their slender stems shielded by broad leaves.

A top-down view of a mayapple leaf, surrounded by lesser celandine.

While the entirety of the mayapple is poisonous, the fruit (with the seeds removed) can be eaten only when it is completely ripe1.

Most commonly, mayapple is used as a substitute for mandrake. While the plants are unrelated, their qualities are similar enough to make such a substitution work.

That means that mayapple is an excellent ingredient in protective or banishing formulas. Some people use it as an ingredient in formulas for renewal, rebirth, or new beginnings, largely because of the fact that the plant appears in spring, produces fruit, and go dormant shortly after the fruit ripens in mid-summer.

A close-up view of a mayapple flower. It appears at the fork between the two leaves of a mature mayapple and has five white petals with a yellow center.

Interestingly, mayapples have a unique relationship with turtles. While the foliage is bitter and deadly enough for herbivores to avoid it, the smaller guys will happily go after the ripe fruits. Box turtles are actually the primary distributors of mayapple seeds2,3. The fruits grow at just the right height for the turtles to reach them, and the seeds are more likely to germinate after being exposed to the turtle’s acidic digestive environment.

While the mayapple is extremely poisonous, it does have a history of use as a medicinal plant. In the past, it was used as an emetic, anthelminthic, and treatment for skin conditions like warts. Podophyllotoxin, one of its primary toxic constituents, is actually the active ingredient in a topical treatment named Podofilox that’s used to treat some viral skin conditions like genital warts and molluscum contagiosum. It works by inhibiting the replication of cellular and viral DNA as it binds to key enzymes4.

If you’re going to use mayapple, do it carefully. Wear gloves. Don’t put it in anything that you’re going to ingest, or even anything that could potentially come in contact with your skin. While the ability to keep DNA from replicating is helpful when you’re trying to kill a skin virus, it’s very much not okay when it’s working on your cells instead.

For real. Be careful.

A botanical illustration of a complete mayapple plant, showing the pair of leaves, white flower, and large root.
n71_w1150 by BioDivLibrary is licensed under CC-PDM 1.0

Whole dried mayapple roots could be used to make an alraun. This is a dried tormentil or false mandrake root (Bryonia alba) used in German folk magic, carved and decorated into a kind of spirit doll. Keeping and properly maintaining one is said to bring good fortune to the household. The alraun (or alraune) would also be bathed in red wine, which could then be sprinkled around the household for protective purposes.

Caring for an alraun is pretty intensive. Once prepared, it needs to be wrapped in a red and white silk cloth, put in a special case, and bathed in red wine every Friday. On each new moon, it should be given a new shirt. These dolls were also passed down through families, though they must be inherited in a particular way: When the father of a family dies, his eldest son may inherit the alraun by placing a piece of bread and a coin in his father’s coffin. If the eldest son dies, his eldest son (or younger brother, if he has no sons) may likewise inherit the alraun by the same method5.

If creating and caring for an alraun seems a bit intense, you can also use dried mayapple in container spells. Just make sure to wear gloves while handling it, and don’t place it anywhere where children or animals may come in contact with it.

Rinse the dried root in water or alcohol and sprinkle it around anywhere you wish to protect. Again, be cautious not to get it on your skin.

The seeds would be useful in formulas for rebirth or renewal. However, as mayapple has never particularly called to me as a “renewal” herb, I can’t offer any more in-depth suggestions here.

Mayapples are beautiful, unusual little plants. They pop up in spring in all of their bizarre glory, flower, fruit, and are gone by late summer. Treated with respect, they can be very useful — even heirloom-worthy — magical tools.

  1. Mayapple: Pictures, Flowers, Leaves & Identification | Podophyllum peltatum. https://www.ediblewildfood.com/mayapple.aspx.
  2. Braun, J., & Brooks, G. R. (1987). Box Turtles (Terrapene carolina) as Potential Agents for Seed Dispersal. American Midland Naturalist, 117(2), 312. doi:10.2307/2425973.
  3. Rust RW, Roth RR. Seed Production and Seedling Establishment in the Mayapple, Podophyllum peltatum L. The American Midland Naturalist. 1981;105(1):51. doi:10.2307/2425009
  4. Podofilox (topical) monograph for professionals. Drugs.com. (n.d.). https://www.drugs.com/monograph/podofilox-topical.html
  5. Deutsche Sagen, herausg. von den Brüdern Grimm. Google Books. https://books.google.com/books?id=SRcFAAAAQAAJ&pg=PA135. (In German.)

life

Project Pan: What’s Worth It, and What Wasn’t.

As I mentioned a bit ago, I’ve been doing a sort of Project Pan with my skincare supplies. (I am not a dude of makeup, so I don’t tend to accumulate enough of that to warrant one. When I do get fancy face colors, they’re usually sample sizes to begin with.) I’ve made quite a bit of progress, so I thought I might do a short breakdown of what proved to be worth re-buying, and what definitely wasn’t.

For full disclosure, I’ve got sensitive combination skin. Finding products that work for me is a challenge — even if I get samples first, it can take a bit for negative reactions to become apparent. That’s why I’ve accumulated skincare over time, as I try to find what actually does the job without too many downsides.

Also, absolutely nobody is paying me to do this and none of these are affiliate links. I’m just including them for convenience’s sake, so you can check out whatever piques your interest. All product photos belong to their respective brands.

composition of cosmetic bottle with pink rose petals and wooden plate
Photo by Photo By: Kaboompics.com on Pexels.com

First, the stuff worth re-buying:

Cleanser: Trader Joe’s Nourish cleanser, about $7

This stuff just works for me. It’s also cheap and easy to get and if they ever discontinue it, I may have a fit of apoplexy. It doesn’t irritate or dry out my skin the way many other cleansers do, and it doesn’t leave any weird residues. It’s just nice and functional.

My only complaint is the plastic bottle (the efficacy of plastic recycling has been greatly overstated), but it’s a pretty basic one without any extraneous bells and whistles so at least it isn’t as wasteful as it otherwise could be.

Toner: Pyunkang Yul Essense Toner, $15.99

This toner is more like a serum. It’s inexpensive, it’s soothing, and it has astragalus extract in it which I guess does something. I’ve had days when all I’ve used is a cleanser, this, and moisturizer, and my skin has felt fabulous. I also notice a difference when I’ve run out of it.

I pat it on my skin immediately after washing, while my face is still damp. Then I either use a serum on top of it, or go right to moisturizer.

This is another product that comes in a plastic bottle, but, because of the way it’s dispensed, I’m not sure how well glass or aluminum would work. As with the TJ’s cleaner, at least it’s a pretty basic bottle.

Serum #1: The Ordinary Marine Hyaluronate, $9.20

This is a waterier version of The Ordinary’s other hyaluronic acid. It’s very light, but it does the job. It doesn’t make my skin feel tight or sticky, it’s just a gentle, soothing humectant. I use about five drops of it, so a bottle lasts me for a while. The very light, watery texture also means that it layers well with other serums — it absorbs right away, so there’s no pilling or other weirdness.

Like the PKY toner, I also notice a difference when I’ve run out of this one. It’s just so nice for some added moisture under a heavier serum or cream.

This one comes in a glass dropper bottle. I often end up reusing these for oil blends and other stuff.

Serum #2: The Ordinary Pycnogenol 5%, $11.50

This is an oil-like (but oil-free) serum containing maritime pine extract. It’s a potent antioxidant, and the consistency means that it’s moisturizing, too. The naturally reddish color also makes me look like I’m painting my cheeks with the blood of my foes, and that’s a neat concept!

It has a natural sort of piney, almost floral fragrance. It’s very nice. I like to use this during the day, or at night any time I’ve been in the sun, on the road, or otherwise exposed to conditions that would make me benefit from some help with skin recovery.

These come in little amber glass dropper bottles. As with the hyaluronic acid serum, I usually end up reusing them myself. It’s a tiny bottle, but a little bit goes a very long way.

Serum #3: The Ordinary Lactic Acid 5% + HA, $8.10

This is a gentle chemical exfoliant. I don’t respond super great to retinoids, but lactic acid leaves my skin plump and glowy. There’s also a 10% version, but I like the gentler 5% version more for my sensitive skin.

I use about three drops at night, and definitely notice a difference when I haven’t been using it. It’s nice, it doesn’t sting, smell terrible, or leave my face feeling tight or gunky.

These come in frosted glass bottles.

Day Cream: Pyunkang Yul Calming Moisture Barrier Cream, $16.99

This is a light day cream that’s almost between a cream and a gel. I use it in the mornings, and it doesn’t feel heavy, break me out, or leave my skin sticky. It’s just a nice, inexpensive moisturizer that works. No fragrances, nothing that makes my sensitive combination skin uncomfortable, it’s just good.

The jar is heavy plastic. I wish it was glass. I love it, but if I’m able to find a substitute in a glass jar then I wouldn’t mind switching.

Night Cream: Derma-E Ultra Hydrating Advanced Repair Night Cream, $31.50

This is the most expensive item in my routine, and it’s still really reasonable for what it does and how much I use. It’s a nice, rich cream that absorbs well but is still occlusive enough that I don’t feel like it’s all gone by morning. Layered over hyaluronic acid and pycnogenol, it’s lovely. The jar isn’t huge, but it lasts me for quite a while.

This one comes in a glass jar, which is rad.

Sunscreen: haruharu WONDER Black Rice Pure Mineral Relief Daily Sunscreen, $22.00

This stuff is really nice. It’s SPF 50+, made for sensitive skin, reef safe, and doesn’t leave me with a whitish case. (I have light skin with beige undertones. It is aggressively neutral and, even though my skin is light, a lot of mineral sunscreens make me look like I’m wearing corpse paint.) It’s also lightly hydrating and feels nice.

I wish it came in a glass pump bottle. Their other packaging materials are 100% recycled and Forest Stewardship Council-certified paper printed with soy-based inks, so that’s nice.

The stuff that I’m not re-buying:

Serum: The Ordinary Matrixyl 10% + HA, $10.90

I don’t know if this even did anything other than make my face sticky and give me an occasional pimple. Someone else may very well benefit from it, but I didn’t see any.

I ended up using it on the backs of my hands so it wouldn’t go to waste. My hands did look smoother and feel softer, but I feel like adding a serum step to an anti-aging hand care routine is a bridge too far for me.

The bottle is a nice glass dropper bottle, though.

Serum: The Inkey List Retinol Serum, $15.00

This one was just sort of fine. I probably would’ve repurchased it, but the plastic squeeze tube was a really annoying and inconvenient way to dispense it. I feel like I waste product by dispensing it into my hands first, so I really prefer to be able to drop a single drop where my skin needs it most. With this packaging, it almost invariably dispensed way more than I needed, which got annoying.

I used it all up on my face, but the inefficient application and plastic tube make it a no for me.

Moisturizer: The Inkey List Bakuchiol Moisturizer, $15.00

I’ve used products with bakuchiol in the past, but this moisturizer was a no-go for me. The squeeze tube, while not my favorite, was fine for applying a cream. However, the moisturizer itself was just kind of sticky and irritating. I don’t like feeling sticky, and I don’t like feeling itchy, and this did both.

I ended up using it on the backs of my hands, and now my hands are officially fancy.

Lip Balm: The Inkey List Tripeptide Plumping Lip Balm, $13.00

I wanted to love this. I did. It even seemed to work at first — my lips felt smoother and plumper, and it wasn’t sticky. The trouble here lies in one single ingredient: Castor oil.

For some people, castor oil is fine. For others, not so much. If you find that lip balm tends to make your lips flakier afterward, you might be sensitive to castor oil. (You may also find that you react badly to natural deodorants that contain zinc ricinoleate.)

This balm made my lips to dry and peely, it was almost like a chemical burn. Like, dead-of-winter, have-not-had-a-drop-of-moisture-even-half-of-a-time-in-months dry. Your mileage may vary, but, if you’ve had issues with products containing castor oil or zinc ricinoleate in the past, you probably want to skip this one.

I’m feeling pretty good. I’ve whittled things down to what works for me, and I don’t feel a need to try to continue to optimize my routine. A cleanser, a toner, serum, and moisturizer. One exfoliating serum, one moisturizing serum, and one antioxidant serum. I’m pretty much covered for whatever my skin goes through.

life

“YOU WOULDN’T DOWNLOAD KOMBUCHA!”

Remember when I was brewing water kefir and accidentally almost made my Handsome Assistant lose an eye? As much as I loved the process (and the product), I also found that water kefir required a lot more attention than I am accustomed to from my colonies of semi-feral microorganisms. So, I’d been considering going back to making kombucha.

And remember those PSAs about video piracy from back in the day?

Joke’s on them. I would 100% download a car.

(Also, hello again! I apologize for my unannounced hiatus last week. It was my Handsome Assistant’s birthday, the world is on fire, and I was not feeling my best. I am better now and 100% back on my bullshit again.)

Anyhow, I was originally introduced to kombucha by a very sweet lady from Russia that I used to work with back when I still did Laboratory Stuff. (Predominantly a series of small, purposeful, semi-controlled explosions.) She brought me part of her SCOBY, and I used that for ages. Eventually, I fell out of the practice when my then-partner and I moved.

The trouble is, getting back into making kombucha hasn’t been super easy. Tracking down a live SCOBY isn’t always the simplest process and having them shipped through the mail can be tricky. (Of course, this is true of anything living that has to go through the mail. Bugs. Plants. Small children.)

Fortunately, there is a solution: Just kind of make your own, with a little help from the bottled stuff.

The majority of bottled kombucha on the market is raw. It has to be, in order to do the whole “probiotic” thing. This means that, even without a SCOBY, it contains what you need in order to brew more kombucha.

I’ve read posts that claim that bottled kombucha has been somehow “weakened,” and isn’t as strong as the starter culture used to produce commercial kombucha. I have my doubts about this because this would mean that it also wouldn’t be very effective as a probiotic. I’m also not sure of what kind of process would selectively weaken a probiotic culture in order to… install some kind of microbial DRM, I guess?

Even if this were the case, it doesn’t actually matter. As anyone who’s started a sourdough culture or accidentally left a bottle of juice out for a few days can tell you, the bacteria and yeasts responsible for fermentation are all around us. The trick is to select for those, and not pathogenic bacteria or toxic fungi. If you start with bottled raw kombucha, you’re already starting with something that has the low pH and natural compounds needed to keep down populations of unwanted microorganisms. It might take a couple of rounds for a SCOBY to get to full strength, but it’ll get there. I mean, the first kombucha ever made didn’t have a SCOBY to start with. Even if all you have is a bottle of kombucha, you’re ahead of the game.

A close-up of a jar of tea, showing a thin SCOBY "skin" on the surface,
If you look at the surface of the tea, you can see a thin SCOBY formed from the bottled kombucha.
  1. Get a bottle of kombucha. Make sure it’s raw. Flavor doesn’t really matter. Drink about half to two thirds of it. Leave the goopy stuff at the bottom.
  2. Clean a nice, wide mouth jar. Rinse it thoroughly.
  3. Brew up some nice, strong tea in your jar. I prefer green. (While you technically can make kombucha from herbal tea, this isn’t really recommended. If you do want to do so, you’re advised to cycle between a batch of herbal kombucha and a batch of the regular kind. To start with, you’re better off working with actual tea — the stuff made from Camellia sinensis, without any other additives.)
  4. Add a bunch of sugar. It should be very sweet, albeit not syrupy. Don’t worry about the sweetness, because the kombucha will eat most of the sugar anyway.
  5. Allow the tea to cool to room temperature, or just slightly above. Too much heat will kill off the culture.
  6. Swirl the bottled kombucha thoroughly to incorporate the goopy stuff into the liquid. Pour the bottled kombucha into your tea and sugar mixture.
  7. Cover the jar with a bit of cloth, a sturdy paper towel, or a coffee filter. Secure it with a rubber band.
  8. Put it someplace clean, warm, and dry, out of direct sunlight.
  9. Ignore it for a while. You’ll eventually begin to see a thin, translucent “skin” forming on the top. This is a baby SCOBY! With time, it’ll get thicker.

After a week or so, your SCOBY should be a bit more substantial. Brew up more tea and sugar and transfer it to a new jar to allow it to continue to grow. The old SCOBY will break down, and a new one will form on the top. If conditions are right, it’ll gain some strength with each successive iteration. It’s a good idea to cut the SCOBY into halves so you can have two separate batches running at once — that way, if one goes weird, you’ll still have a backup.

So far, this process has been working out well for me. The SCOBY is SCOBYing, and I’m coming up with ideas for flavoring a second ferment. I’m thinking a ginger peach or raspberry and rose.

Plants and Herbs

The solution to kudzu: Eat it.

The other day, I posted a video of foraging and processing kudzu roots to a group I’m a part of. A few friends seemed interested — one messaged me that they knew of a potential patch. That weekend, armed with trowels, bags, and gloves, we set out to track us down some kudzu.

If you’re in the southeastern US and you do any kind of gardening, the word “kudzu” may well strike fear into your heart. As Nature.org‘s “Kudzu: The Invasive Vine that Ate the South” puts it, “kudzu is quite a killer, overtaking and growing over anything in its path.” Drive down a highway, and it’s not uncommon to see it choking out trees, climbing over fences, and dragging down powerlines.

In short, we were more than happy to learn how to eat some.

In its native range, kudzu is still an aggressive grower. It’s not invasive, of course, because a native plant by definition can’t be invasive. One of the things that helps keep kudzu in balance is the fact that it’s useful as a food and medicinal plant. People regularly harvest it to eat as a root vegetable and process into starch.

There’s only one problem: It was very early spring. There were no leaves on anything. Identifying it meant looking for a specific kind of brown twig in a mass of other brown twigs, then trying to follow it back to the ground, dig there for a while, and hope it had led to something resembling a kudzu root. Fortunately, kudzu doesn’t have many lookalikes, and its hairy stems and growth habit help to differentiate it.

Also, kudzu roots get enormous.

My Handsome Assistant is a powerlifter. Even with him pulling and our friend and me digging, it still took a lot of time to liberate several fairly small roots. Still, it was a success and, I figured, I decent amount for a first attempt. Nothing we’d have to bust out a table saw to cut through. Just enough to hopefully end up with some starch (and give us the opportunity to decide if it was worth the effort).

A small clump of kudzu roots in a stainless steel sink.
Some of the kudzu roots, trimmed from a larger one.

Tl;dr, I’m probably just going to make them into a stew next time. Maybe paper.

Processing the kudzu roots involved scrubbing them well, peeling away their tougher, fibrous outsides, cutting them into chunks, and pureeing them well with plenty of water. Once pureed, we strained the pulp, squeezed it out, rinsed it, squeezed it out again, and poured the liquid into large jars to let the starch settle to the bottom.

It was that last bit that proved the most problematic.

See, we’d hoped to get the roots before they used their stored energy (in other words, starch) to put out a flush of new spring growth. However, the roots we got were small and fairly skinny (which is probably for the best — we might’ve needed a backhoe for big ones). The little bit of starch that settled out ended up lost during the refinement and decanting process.

Still! It was an interesting learning experience. I’d definitely change how we did some things (like I mentioned, I’d love to try preparing the smaller roots in other ways, like roasting or stewing). I also have a mold and deckle and, considering that starch is used as sizing for papermaking, I’d like to try using the pulp to extract most of the starch and, rather than discarding/composting the pulp, see how it works in paper.

I’ve also heard that the flowers smell like grape candy and can make a jam that tastes like something between apple and peach. Since I’ve had really good results making rose petal confiture, I’m excited to try making some with kudzu flowers.

So, obtaining some kudzu starch may have been a bust this time, but I have ideas!